Free Slouchy Puff Hat Crochet Pattern
Looking for a stylish, cozy, and easy crochet hat pattern? The Slouchy Puff Hat is a versatile design that works up quickly, making it a perfect project for beginners and experienced crocheters alike.
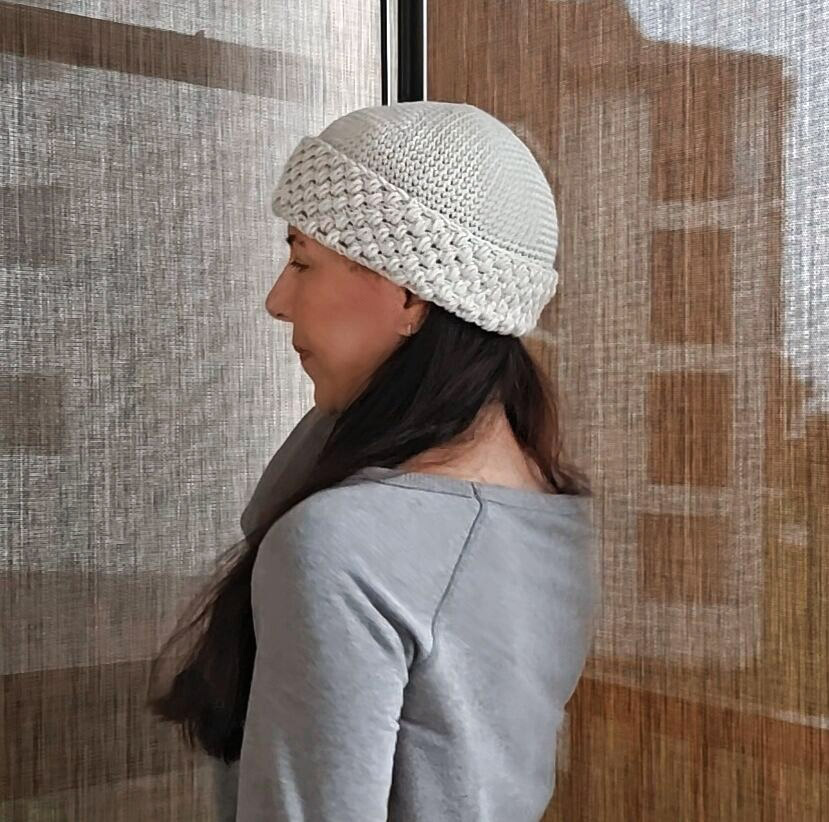
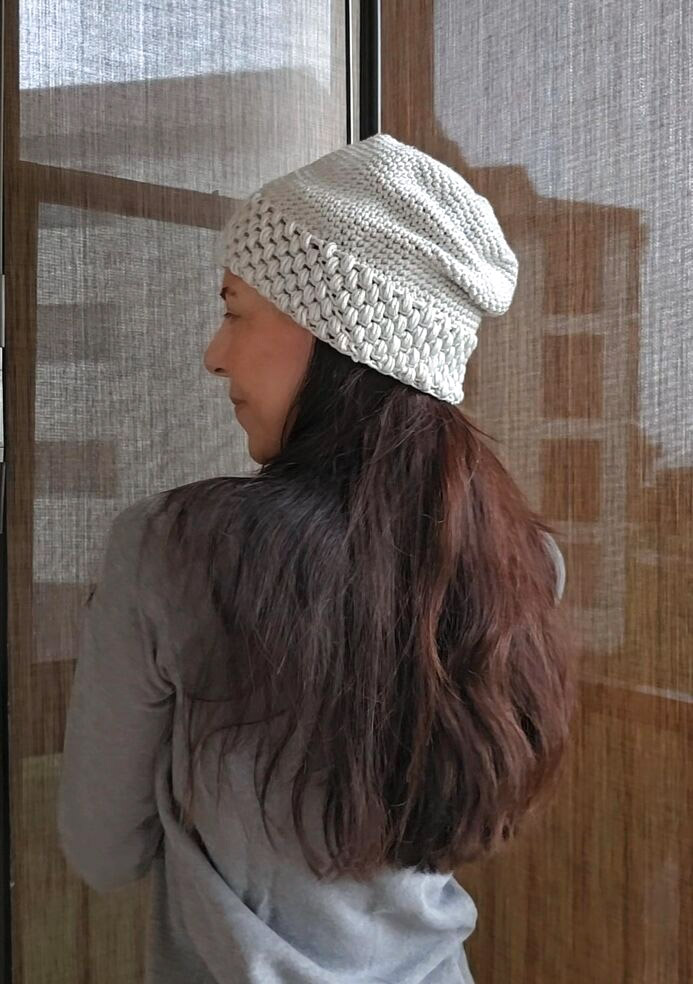
What makes this pattern special is its 2-in-1 versatility: you can wear it as a relaxed, oversized crochet slouchy beanie—ideal for when your hair is up in a bun or ponytail—or fold the thick brim over to turn it into a classic, fitted crochet beanie.
The cozy texture comes from the featured puff stitch (written as a cluster stitch in the pattern instructions), which adds a beautiful, squishy dimension to your crochet winter accessories. Tip: Keep your hand tension slightly loose when working these cluster stitches so your hands don’t tire out!
How the Pattern Works
This hat begins at the crown and is worked top-down in continuous spiral rounds of simple single crochet. The main body is worked extra long to give it that effortless slouchy look, and it finishes off with an eye-catching textured puff stitch band.
While the free pattern is written for a standard adult size (20-inch band circumference), it is extremely easy to modify. As long as you stick to an even stitch count, you can adjust the circumference to make any size you need using your favorite worsted weight yarn.
Pattern Details & Materials
Skill Level: Beginner / Easy
Materials:
- Yarn: ~200 yards of Medium Weight Yarn (Category 4). Sample shown in Yarn Bee Simply Flawless in the color Mist.
- Crochet Hook: Size H/8 (5.0 mm) crochet hook (or size needed to obtain gauge)
- Notions: Stitch markers, yarn needle, scissors
Gauge:
- 15 single crochet (sc) = 4 inches
Finished Size:
- The textured cluster stitch band measures 20 inches in circumference (fits standard adult heads).
Ready to get stitching? Scroll down for the full free pattern instructions below!
Cluster (abbreviated CL) instructions: CL = *yarn over hook, insert hook into stitch and draw up a loop; repeat from * 2 more times, then yarn over hook and draw through all 7 loops on hook, chain 1 to secure it.
DIRECTIONS:
Starting with the crown of the hat ch 4 & join with a slip stitch in the first ch to form a ring.
– Work 6 sc in ring. The top of the hat is worked in continuous rounds so you will not be joining at the end of each round. Place a marker on the first sc and move the marker up each round to mark the first sc.
INCREASING ROUNDS:
1: 2 sc in each sc around to end. (12 sc)
2: 1 sc in first sc, 2 sc in next sc, *1 sc in next sc, 2 sc in next sc; repeat from * around to end. (18 sc)
3: 1 sc in each of first 2 sc, 2 sc in next sc, *1 sc in each of next 2 sc, 2 sc in next sc; repeat from * around to end. (24 sc)
4: 1 sc in each of first 3 sc, 2 sc in next sc, *1 sc in each of next 3 sc, 2 sc in next sc; repeat from * around to end. (30 sc)
5: 1 sc in each of first 4 sc, 2 sc in next sc, *1 sc in each of next 4 sc, 2 sc in next sc; repeat from * around to end. (36 sc)
6: 1 sc in each of first 5 sc, 2 sc in next sc, *1 sc in each of next 5 sc, 2 sc in next sc; repeat from * around to end. (42 sc)
7: 1 sc in each of first 6 sc, 2 sc in next sc, *1 sc in each of next 6 sc, 2 sc in next sc; repeat from * around to end. (48 sc)
8: 1 sc in each of first 7 sc, 2 sc in next sc, *1 sc in each of next 7 sc, 2 sc in next sc; repeat from * around to end. (54 sc)
9: 1 sc in each of first 8 sc, 2 sc in next sc, *1 sc in each of next 8 sc, 2 sc in next sc; repeat from * around to end. (60 sc)
10: 1 sc in each of first 9 sc, 2 sc in next sc, *1 sc in each of next 9 sc, 2 sc in next sc; repeat from * around to end. (66 sc)
11: 1 sc in each of first 10 sc, 2 sc in next sc, *1 sc in each of next 10 sc, 2 sc in next sc; repeat from * around to end. (72 sc)
12: 1 sc in each of first 11 sc, 2 sc in next sc, *1 sc in each of next 11 sc, 2 sc in next sc; repeat from * around to end. (78 sc)
13 – 30 (no more increasing): 1 sc in each sc around to end.
DECREASE ROUNDS (The next 2 rounds you will be decreasing a total of 12 stitches which will make the hat band 20 inches in circumference):
1: Sc in each of first 11 sc, sc2tog (1 sc decrease made), *sc in each of next 11 sc, sc2tog; repeat from * around to end. (72 sc) If you are making another size with a different amount of stitches, decrease 6 stitches evenly around.
2: Sc in each of first 10 sc, sc2tog, *sc in each of next 10 sc, sc2tog; repeat from * around ending slip stitch in first sc. (66 sc) If you are making another size with a different amount of stitches, decrease 6 stitches evenly around.
PUFF/CLUSTER STITCH HAT BAND ROUNDS:
NOTE: Before beginning this round make sure you have an even number of stitches if you are making another size. You will have half the amount of clusters than stitches. For example if you decrease it to 56 stitches you will have 28 clusters.
1: Skip first sc where slip stitch was made, 1 CL in next sc (place marker for first CL), *skip next sc, 1 CL in next sc; repeat from * around to end. Slip stitch on top of first CL. (33 CL)
2 – 7: 1 CL in first space between first 2 CL’s (place marker for first CL), * 1 CL in each space between the next 2 CL’s; repeat from * around to end. Slip stitch on top of first CL. (33 CL)
Fasten off at the end of round 7.
Happy Crocheting!
I’d love to see your finished hats! If you make one, tag me on Instagram @chezpascale_crochet or drop a comment below letting me know what yarn color you picked.